Settings for Monthly Plan eSIM
To use 5G/4G internet with eSIMs, you need to set Access Point Name (APN) on your devices.
General instruction is below. APN setup procedures slightly differ depending on your models of phone or phone companies. For iOS or Android devices, please check the following instructions.
Installation Procedure
Stable Internet Connection is required.
- This eSIM can only be installed ONCE on the device with the EID number you provided us.
- DO NOT STOP/CANCEL half way through the eSIM installation on Step 3.
- DO NOT DELETE/REMOVE your eSIM from your device after the successful installation.
- Turn OFF all other SIM/eSIMs when installing our eSIM. You can turn them back ON when the process is complete.
For customers who installed the eSIM using the pop up notification, please also follow steps below to complete the eSIM activation.
Step 1
Enter access code
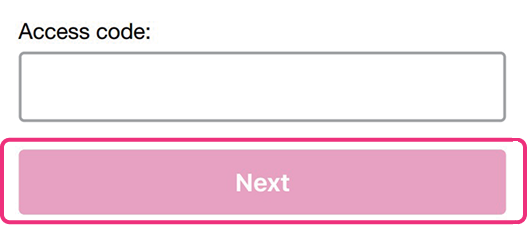
Enter “Access Code” from the email titled
“Your Order Has Been Shipped”
You may receive a pop-up notification on the latest iOS.
The steps may vary slightly depending on the pickup location.
Please check our FAQ for more details.
Step 2
Issue QR code

Tap "Activate this eSIM" to issue the QR code.
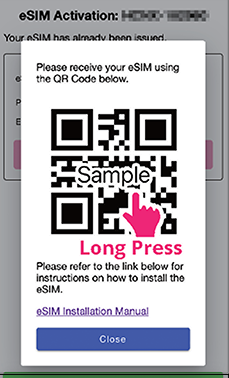
Use QR code for eSIM installation
Depending on your phone model, you can download the QR code
image and upload this image from gallery/photos in Step 3.
The "eSIM installation QR code" will appear. We recommend transferring the QR code image to another device so you can scan it with your camera in Step 3.
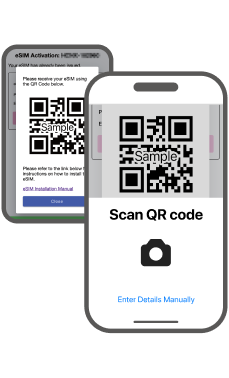
Step 3
eSIM installation
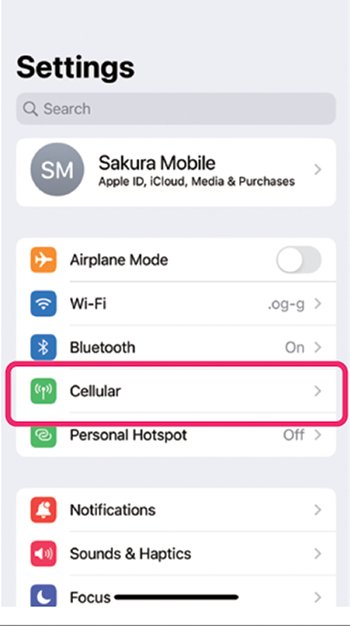
Open “Settings” > “Cellular”
(or “Mobile Data”).
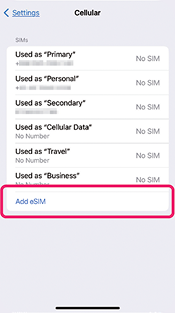
Tap “Add eSIM”.
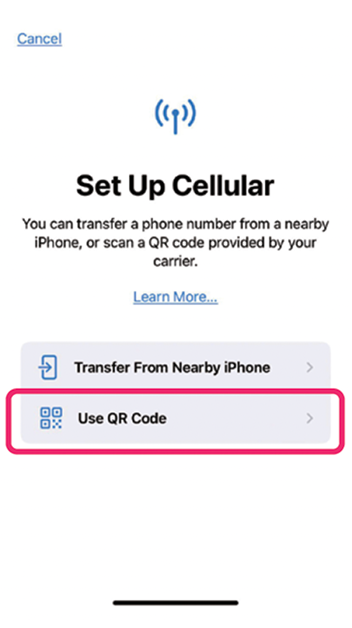
Tap “Use QR code”.
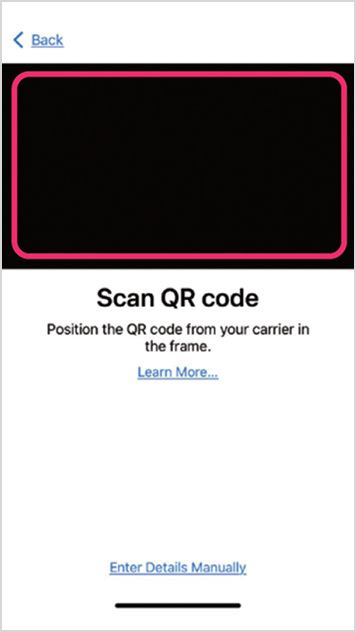
Scan or upload “the activation QR code” received in the previous Step 2.
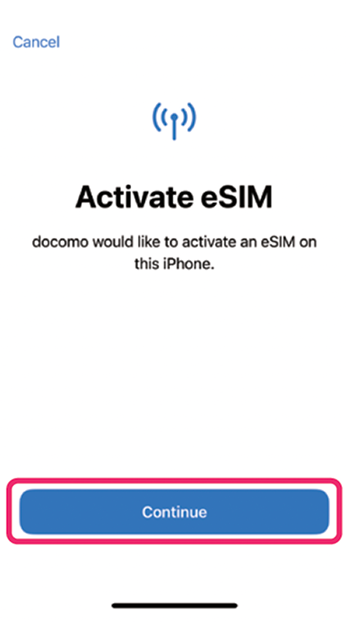
Tap “Continue”.
It will take about 1 minute.
Please do not cancel!
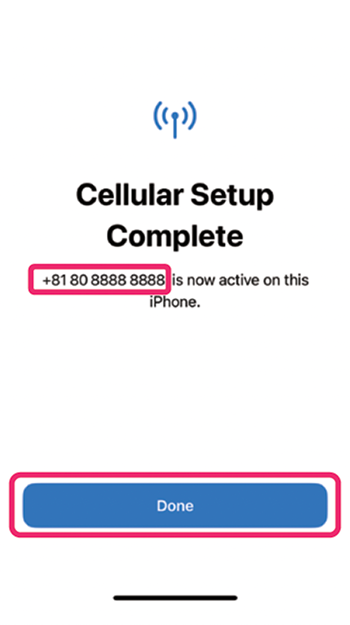
Check your phone number and tap “Done”. Then proceed to Step 4.
You won't be able to use your data if you don't complete Step 4.
Step 4
APN Setup Procedure
For iOS 15 or later
For other iOS or devices check here
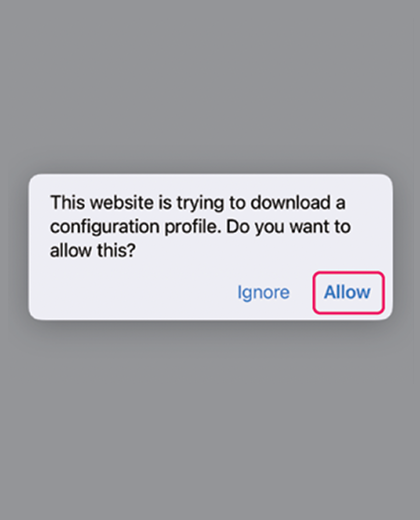
Tap “Allow” to download.
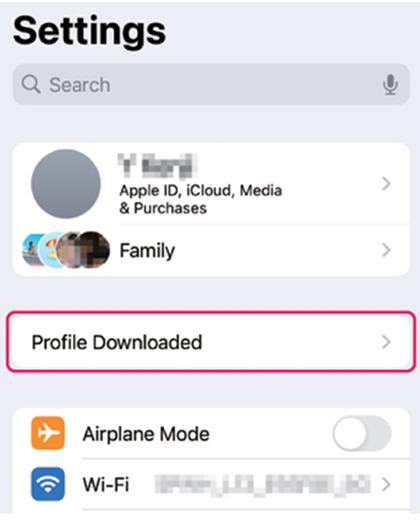
Go back to the settings page and tap “Profile Downloaded”.
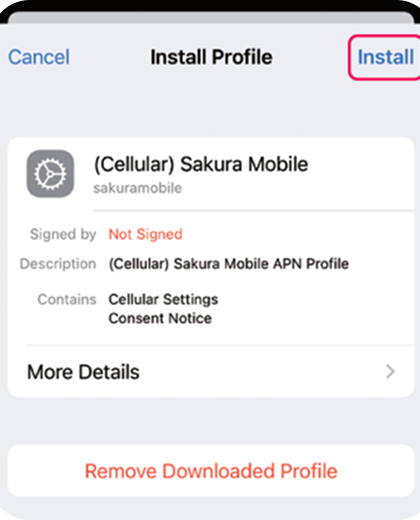
Tap on the following: “Install” > “Next” > “Install”.
(Enter your iPhone password, if requested)
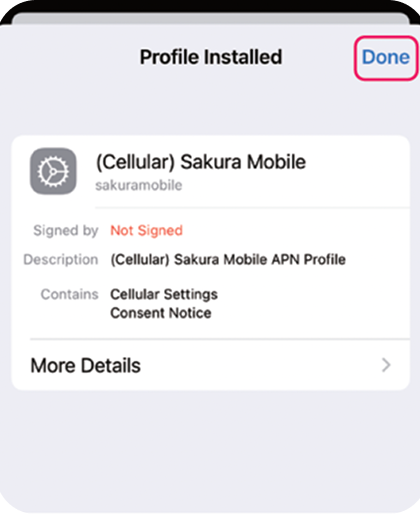
Tap “Done”.
Stable Internet Connection is required.
- This eSIM can only be installed ONCE on the device with the EID number you provided us.
- DO NOT STOP/CANCEL half way through the eSIM installation on Step 3.
- DO NOT DELETE/REMOVE your eSIM from your device after the successful installation.
- Turn OFF all other SIM/eSIMs when installing our eSIM. You can turn them back ON when the process is complete.
For customers who installed the eSIM using the pop up notification, please also follow steps below to complete the eSIM activation
Step 1
Enter access code
Enter “Access Code” from the email titled
“Your Order Has Been Shipped”.
You may receive a pop-up notification on latest Android devices.
The steps may vary slightly depending on the pickup location.
Please check our FAQ for further details.
Step 2
Issue QR code
Tap "Activate this eSIM" to issue the QR code.
Use QR code for eSIM installation
Depending on your phone model, you can download the QR code image and upload this image from gallery/photos in Step 3.
The "eSIM installation QR code" will appear. We recommend transferring the QR code image to another device so you can scan it with your camera in Step 3.
Step 3
eSIM installation
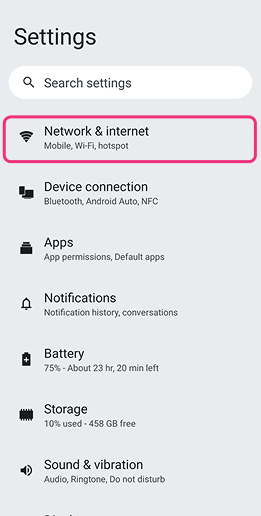
Open “Settings” > “Network & Internet”.
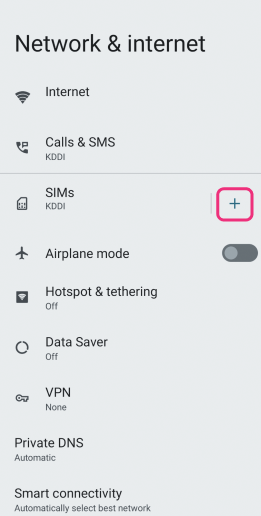
Tap “+” or “SIM Manager” to add the eSIM.
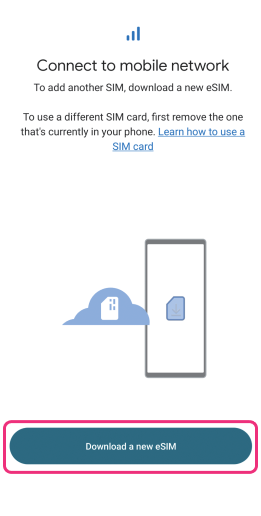
Tap “Download eSIM”.
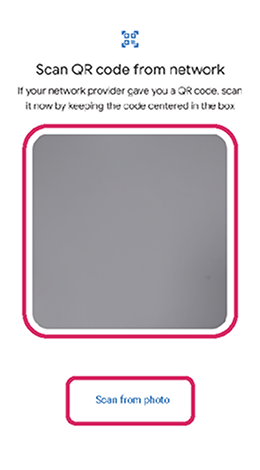
Scan the "activation QR code" or tap "Scan from photo" to select the saved QR code from Step 2.
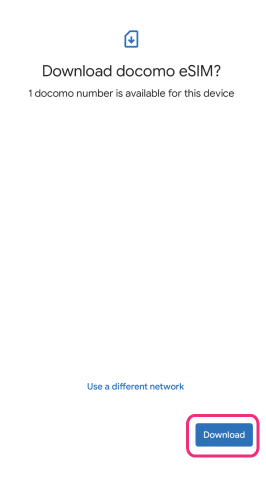
Tap “Download” to save the eSIM.

You should see a screen confirming the eSIM downloaded. Then proceed to Step 4.
You won't be able to use your data if you don't complete Step 4.
Step 4
APN Setup Procedure
| Name | sakuramobile |
|---|---|
| APN | vmobile.jp |
| username | sakura@sakuramobile.jp |
| password | sakura |
| Auth. type |
PAP or CHAP |
How to Set Up APN on Android
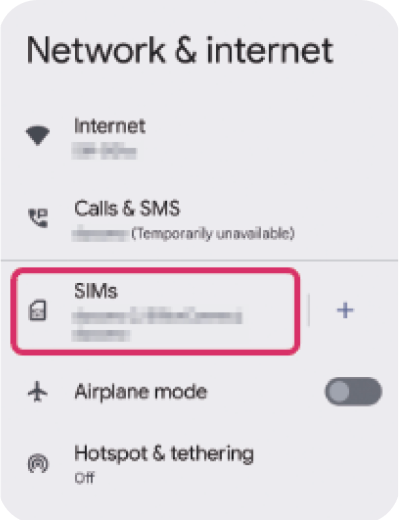
Open "Settings” > “Network & Internet” > “SIMs”.
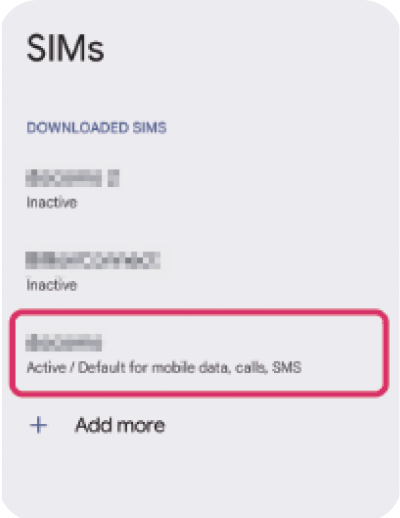
Tap the eSIM you have downloaded in Step 2.
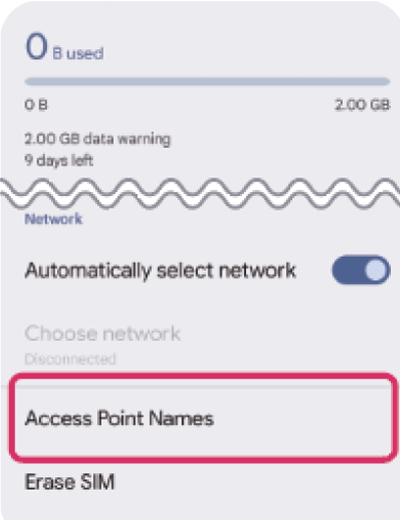
Tap “Access Point Names”.
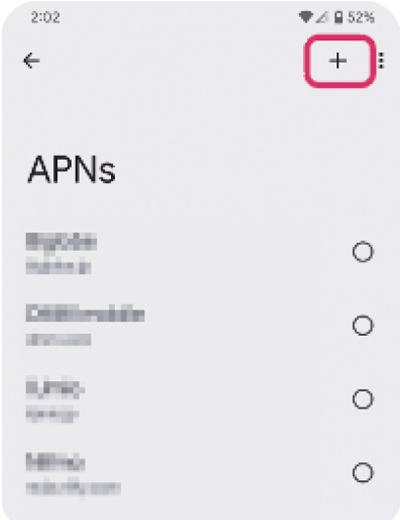
Tap on “+” or “Add” to create new APN.
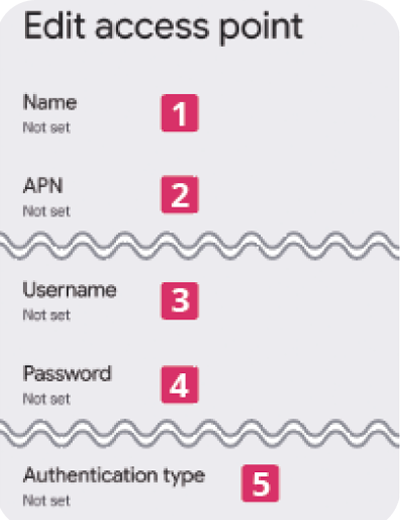
Edit the APN values according to the instructions below.
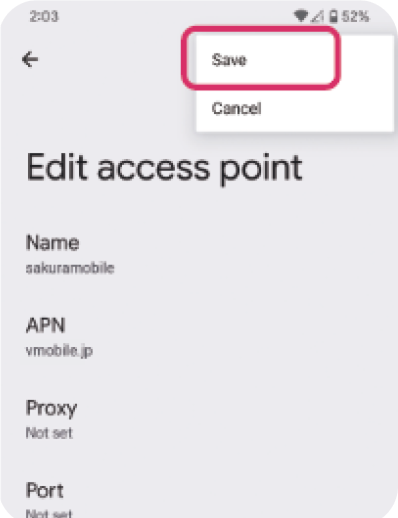
“Save” the APN you created.
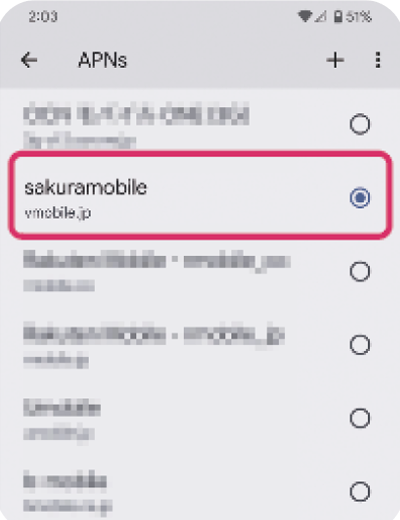
Select the APN you created.
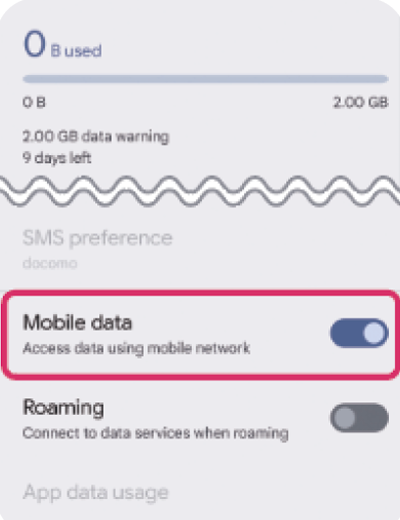
Please check if Mobile Data is turned ON and restart the device if necessary.
For Dual devices check here.
For other devices check here.
Need more help?
We’re happy to help! Feel free to contact us or talk to us.


