
To become an official resident in Japan, you’ll have to prepare documents for the notorious ward office procedures, making a phone number, and opening a bank account. Are you aware of the optimized order for completing these tasks?
While your school may provide newcomer guidance documents, they might overlook some procedures or lack detailed instructions on the task order.
If you only rely on the school guide, you might end up having to go to the stuffy and crowded ward office several times.
Here, I tried to arrange it in the most efficient order and put together a comprehensive guide with detailed tips to minimize your stress!
Now, let’s jump into it!

Hello readers! Sakura Mobile is a SIM WiFi service provider for international residents and tourists in Japan.
Our global editorial team living in Japan will introduce the charms of the country based on what we have actually experienced and felt.
Table of Contents
1. Receive Student ID Card
Before you do anything, first visit your school to receive your student ID card or, if not possible, a Certificate of Admission. Check your school’s website to confirm how and when to get your ID card. It may take a few days to issue the card, depending on necessary procedures, such as entering your address into the school website system.
You need to get your student ID card because it’s required for two things: opening a Japan Post bank account and enrolling in National Health Insurance at a reduced rate. While most city hall/ ward offices accept a Certificate of Admission, in the case of Japan Post bank, many branches require a student ID for account setup.
Alternative schedule for those who can’t immediately obtain a student ID
Get a Certificate of Admission at school (Check when you can receive your student ID card)
↓
Go to City Hall/ Ward Office for necessary and urgent procedures.
↓
Get a student ID card & Make a phone number (Order doesn’t matter)
↓
Go to Japan Post Bank
↑ Go back to the table of contents
2. Go to City Hall/ Ward Office
What is the City Hall/Ward Office?
Like in many other countries, individuals register themselves at the local municipality in Japan. Depending on your residence, that could be a city (shi, 市), ward (ku, 区), town (chō or machi, 町), or other local administration. City Hall (shiyakusyo, 市役所) is the local office of the city, and the Ward Office (kuyakusyo, 区役所) is that of the ward.
Let’s take Tokyo as an example. Based on your address, if you live in Shinjuku ward, go to Shinjuku-kuyakusyo (新宿区役所). If you live in Hachioji city, go to Hachioji-Shiyakusyo(八王子市役所).
Within 14 days after arriving in Japan, you MUST go to the local office to
1. Register your address, 3. Register for National Health Insurance, and 4. Register for the required National Pension System.
What to Prepare Before Visiting the Ward Office
- Passport
- Residence Card
- Student ID Card or Certificate of Admission
- Personal Seal (May be required depending on ward office)
- How to write your name in Katakana and/or Kanji
- Your new address in Kanji and zip code
- Your hometown address in English
- Your school’s address in Kanji and phone number
- Your birthday in Japanese year (Ex. 2005 = 平成 (Heisei) 17)
↑ Go back to the table of contents
What You Need to Do at City Hall/ Ward Office
(1) Register Your Address
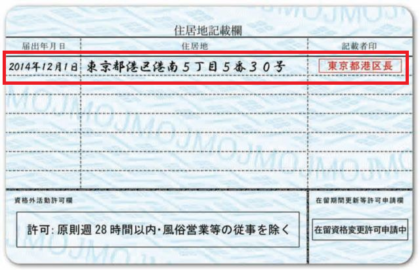
You should have the residence card you received at the airport. By registering your home address and getting it written on the back of your card, you’ll become a certified resident of the area!
Regarding Residence Card Issuance, please check our previous article!
Link: Study Abroad in Japan (Part 2) Upon Arriving: What to Get Done at the Airport
<How to Register Your Address>
Here is the general flow when you first enter the ward office. However, this may vary depending on the office.
Step 1. Once you enter the ward office, the staff will usually ask you about the purpose of your visit. Tell them “住民登録をしたいです。(jyumin toroku wo shitai desu. = I want to make a residence registration.)”
Step 2. Fill out the registration form they will give you. They will likely provide an English guide document if you ask.
Step 3. Take a numbered ticket and wait.
Step 4. Submit the paperwork and residence card when you’re called.
Step 5. They will give you a new number ticket. Wait until the registration is done. This wait may take an hour.
Step 6. When called, receive your residence card with the new address printed. Ask for Jūminhyō, explained in the next section.
↑ Go back to the table of contents
(2) Get a Residence Record (Jūminhyō) *Optional but recommended.
What is Jūminhyō? Do I really need it?

At step 6 above, the staff might ask if you need a Jūminhyō. A Jūminhyō (住民票) is a resident record, an authorized document containing details about your current address and official information. It depends on whether you need it or not. Some mobile carriers require one to make a phone number (FYI – Sakura Mobile doesn’t. 😄), or your school might require a copy. If you are not sure if you need one, I recommend getting at least one copy. It only costs 300 yen for a copy, but I won’t risk visiting the office again to save 300 yen.
↑ Go back to the table of contents
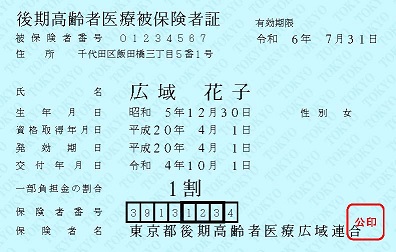
(3) Register for National Health Insurance
All foreign residents are obliged to join the National Health Insurance (国民健康保険,kokumin-kenko-hoken). For international students, if you prove you are a student without any earnings in Japan, the insurance fee is reduced to roughly 1000~2500 yen per month. You will receive the bill via post mail. After enrollment, you only need to pay 30% of the medical expenses.
<How to Register for National Health Insurance>
After the address registration, the staff will explain how to go to the next counter for National Health Insurance enrollment. Usually, this counter is not as crowded as the address registration counter. Just fill out a provided form on the spot, and in most cases, you’ll receive your National Health Insurance card (保険証, hokensho) right away. However, depending on the district, you might receive a mail indicating that your enrollment process is completed after a week. In this case, you should visit the office again to get the insurance card.
Caution: Be sure to carry this card with you at all times, especially when visiting medical institutions (hospital visit, doctor’s visit, dentist, etc.). Without it, you will have to pay the full amount of the medical bill. In this case, you can get a refund by presenting your insurance card later (which is a hassle and requires additional paperwork and steps).
↑ Go back to the table of contents
(4) Register for National Pension System

If you’re under 20 years old, you can skip this part for now! In Japan, all residents aged between 20 and 59 years must join the National Pension System(国民年金, kokumin-nenkin). After you become 20 years old, you will receive “the notification of National Pension system registration” by mail.
Special Payment System for Students
* Reminder: You need a student ID card or Certificate of Admission for this process!!!
Even if you’re over 20, you don’t need to worry about the payment. If you’re a student, you will apply for the “Special Payment System for Students,” and be exempted from payment. You might still receive bills that look like postcards in the mail, but you can just ignore them. After the initial registration at the office, you will receive a postcard in April to re-register via mail or website every year.
Japan Pension Service – Application for National Pension Contribution Special Payment System for Students
<How to Register for National Pension System>
The counter for the National Health Insurance and Pension System might be the same; if it’s different, move to the designated counter. The staff will help you register for the system and sign up for the student exemption at the same time.
↑ Go back to the table of contents
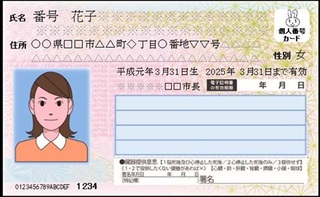
(5) Register for the “My Number Card” *Optional but recommended.
If you’ve completed 1 through 4 above, your immediate tasks at the ward office are done! Remember, though, that you will make one more visit to the office in a couple of months. Once you’ve registered your residence, you’ll receive a notification by mail about “My Number Card” registration in about 1 to 3 weeks.
What is “My Number Card”?
“My Number Card” is your second ID card, in addition to your residence card. Unlike the residence card, it is not mandatory to get one. However, several advantages make it convenient to have the card.
- It can be used as a National Health Insurance Card
- Administrative paperwork can be replaced with an online application
- You can obtain official certificates at convenience stores (ex. Resident record)
Since this is a procedure you’ll be doing in a month, I’ll leave a link below for specific steps for registration!
LINK: My Number Card Official Website
↑ Go back to the table of contents
3. Get a Phone Number

After completing the ward office procedure, move on to the next task: obtaining a Japanese phone number. You need one for almost every registration process in Japan, so if you have a student visa, obtaining a mobile number is necessary.
For a detailed explanation of Japanese providers, how to apply for a phone number online/in-store, and, of course, why Sakura Mobile is recommended, please check our previous blog article: How to Get a Japanese Phone Number | Online Contracts and More
※ Sakura Mobile only requires your Passport if you pick up your SIM card/eSIM at the airport counter or Shinjuku Office. If you have your Residence Card with the address on it, you can have it shipped to your residence!
Difficulties in getting a phone number
-Most carriers provide Japanese customer support only
-Requires an address in Japan
-Registration might be declined if you use an overseas credit card
For most international students, the above three reasons are the main obstacles to setting up a phone number. However, with Sakura Mobile, you can be rescued from these headaches! Not only does Sakura Mobile provide full English support 7 days a week, but you can also receive your Voice+Data SIM on the day of your arrival if you make an online application a few days before your flight. Also, payment with an overseas credit card is no problem! If you are unsure which carrier to use to make a Japanese phone number, Sakura Mobile would be a good option. Check the link below for more inforamation!
LINK: Sakura Mobile Voice + Data SIM/eSIM
Other Related Articles
Japanese Cell Phone Plans for Short and Long-term Students
8 Best SIM Cards in Japan | Cell Phone Plans for Long-Term Stay
↑ Go back to the table of contents
4. Open a Japan Post Bank(Yūcho)Account

You’re almost done now! The last step is to open a bank account with Japan Post Bank (ゆうちょ銀行, yūcho kinko). Since other banks mostly do not let you open a new account within six months of arrival to Japan, most international students open their first account at Japan Post Bank. Also, you can receive some scholarship payments, such as JASSO, only through Japan Post Bank.
TIP: Visit the branch close to your school or your residence. Opening an account is possible at other branches, but the possibility of getting rejected is higher.
What to Know about Japan Post Bank Account
-
Non-resident Account
During the first 6 months of living in Japan, you can only open a “non-resident account.” You can only receive remittances, deposits, or withdrawals; you can’t use Internet banking, make domestic/overseas remittances, or create a credit card. After 6 months, you need to visit the bank to switch your account to a “resident account.”
-
Application Might be Declined
Even though Japan Post Bank is one of the easiest banks for international students to use, your application might be declined for multiple reasons. Ask the staff for the reason for the rejection and try again.
What to Prepare
A passport, Student ID Card, and Residence Card with a registered address are necessary. Bring everything you have prepared at the ward office to make everything easier.
<How to Open a Japan Post Bank Account>
Step 1. Depending on the branch, you may need to make a reservation for account setup. Check if a reservation is necessary through a phone call or visit.
Step 2. Visit the Japan Post Office Bank. Tell the staff “新(あたら)しい口座(こうざ)を開設(かいせつ)したいです。(Atarashii kouza o kaisetsu shitai desu. = I want to open a new bank account.)
Step 3. Fill in the forms provided by the staff. You can create an account with a cash card only, without a bankbook. However, since some part-time jobs may require a bankbook, I recommend making an account with one.
Step 4. Wait for the screening result and cash card/bankbook issuance. The cash card will arrive within a week, and the bankbook in 2 weeks. They are delivered separately by post mail. You need to receive it in person from the postal person. If you are not at home, the postal person will leave a postcard for re-delivery.
Step 5. Start using your account after receiving the cash card!
↑ Go back to the table of contents
5. Conclusion
Writing this blog, I can’t believe how I managed to complete all these procedures a couple of years ago, with my pitiful Japanese, zero knowledge of Kanji, and without a Japanese-speaking acquaintance. It does seem like the survival instinct kicks in once you fall into an environment where you can only depend on yourself.
Although it was way more challenging for me to do it without organized guidance, I hope this article makes it easier for you! However, even with this article, going through the process will be difficult without a mobile phone number and stable internet access. To avoid difficulties while settling in, where you need internet access and a phone number, get a Voice+Data SIM from Sakura Mobile for reliable internet and phone connectivity from the first day of your arrival!
Now that you are an official resident in Japan, let’s move on to a more exciting step—setting up and getting used to your new life! If you found this article helpful, bookmark our blog page, and stay tuned for our next article about setting up utilities and internet!

(Part 1) Before Leaving: What should I pack and prepare?
(Part 2) Upon Arriving: What to Get Done at the Airport
↑ Go back to the table of contents